The preferred way of getting anything done on the Arduino Portenta X8 is by using Docker. So let's start by creating a Dockerfile that builds and installs the pika-spark-bno085-driver in a Docker image that already contains a ROS base image.
FROM docker.io/arm64v8/ros:humble-ros-base

RUN apt-get update && \
    apt-get install -y git && \
    apt-get clean && \
    rm -rf /var/lib/apt/lists/*

RUN mkdir -p /tmp/colcon_ws/src
WORKDIR /tmp/colcon_ws/src
RUN git clone --recursive https://github.com/pika-spark/pika-spark-bno085-driver

WORKDIR /tmp/colcon_ws
RUN . /opt/ros/humble/setup.sh && colcon build --symlink-install

COPY start.sh /
RUN chmod ugo+x /start.sh
ENTRYPOINT ['/start.sh']
As can be seen from the Dockerfile a simple start script (start.sh) is copied into the image which serves to navigate to the location of the BNO085 driver within the container and to run it.
#!/bin/sh
cd /tmp/colcon_ws
. /opt/ros/humble/setup.sh
. install/setup.sh
echo 'Starting pika-spark-bno085-driver ...'
ros2 launch pika_spark_bno085_driver imu.py
In the next step a Docker image shall be built from the Dockerfile using docker build.
docker build --pull --no-cache --tag pika_spark_bno085_driver .
Now its time to enable the GPIOs and SPI interface used for communication between the Arduino Portenta X8's IMX8 application processor and the BNO085 IMU.
GPIO_NIRQ_NUM=131
GPIO_NRST_NUM=86
GPIO_NBOOT_NUM=87

echo $GPIO_NIRQ_NUM > /sys/class/gpio/export
echo $GPIO_NRST_NUM > /sys/class/gpio/export
echo $GPIO_NBOOT_NUM > /sys/class/gpio/export

modprobe spidev
chmod ugo+rw /dev/spidev0.0
As a final step run (docker run) the newly created pika_spark_bno085_driver container passing the SPI interface via --device /dev/spidev0.0 and passing the GPIO interface via mapping the sysfs GPIO interface into the container. If you want to stream network data out of the container (and we do want that, since we want to visualize it via Rviz2 on our development computer) ensure that the X8s network stack is not isolated from the container by passing --network host.
sudo -u fio docker run -it \
  --ulimit nofile=1024:1024 \
  --rm \
  -u 0 --privileged \
  --device /dev/spidev0.0 \
  -v /sys/class/gpio:/sys/class/gpio \
  --network host \
  pika_spark_bno085_driver
You can verify that data is being received on your development PC by checking the output of ros2 topic list and ros2 topic echo /imu.
ros2 topic echo

/imu
/parameter_events
/rosout
ros2 topic echo /imu

header:
stamp:
sec: 1706075938
nanosec: 99494097
frame_id: imu
orientation:
x: -0.00286865234375
y: -0.007080078125
z: -0.46429443359375
w: 0.88568115234375
orientation_covariance:
...
In order to visualize data contained in the /imu topic via Rviz2 first the rviz_imu_plugin needs to be installed.
sudo apt-get install ros-humble-imu-tools
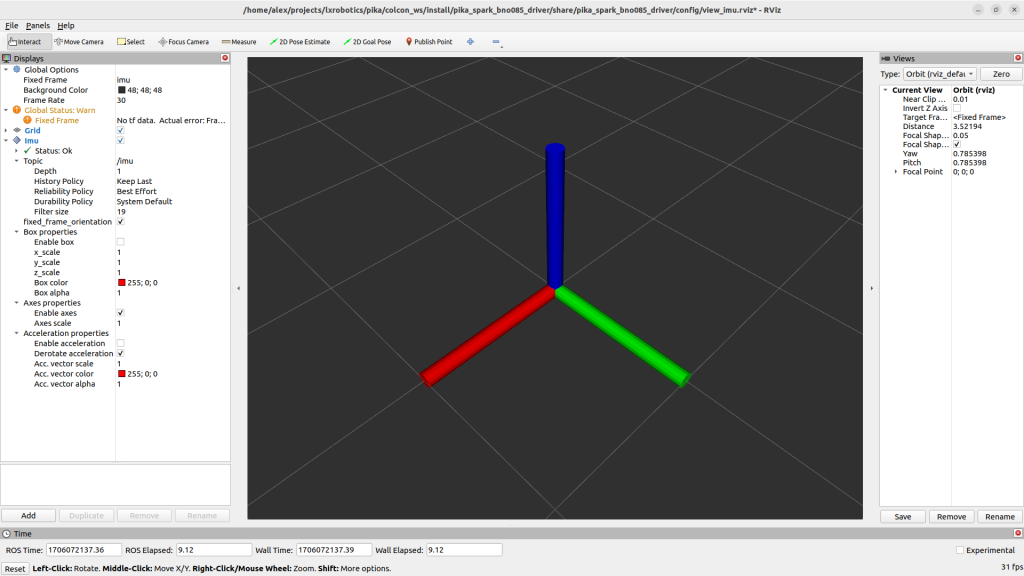
Finally it's time to run Rviz2 with a configuration already tailored for visualizing IMU data.
wget https://raw.githubusercontent.com/pika-spark/pika-spark-bno085-driver/main/config/view_imu.rviz
source /opt/ros/humble/setup.bash
rviz2 -d view_imu.rviz