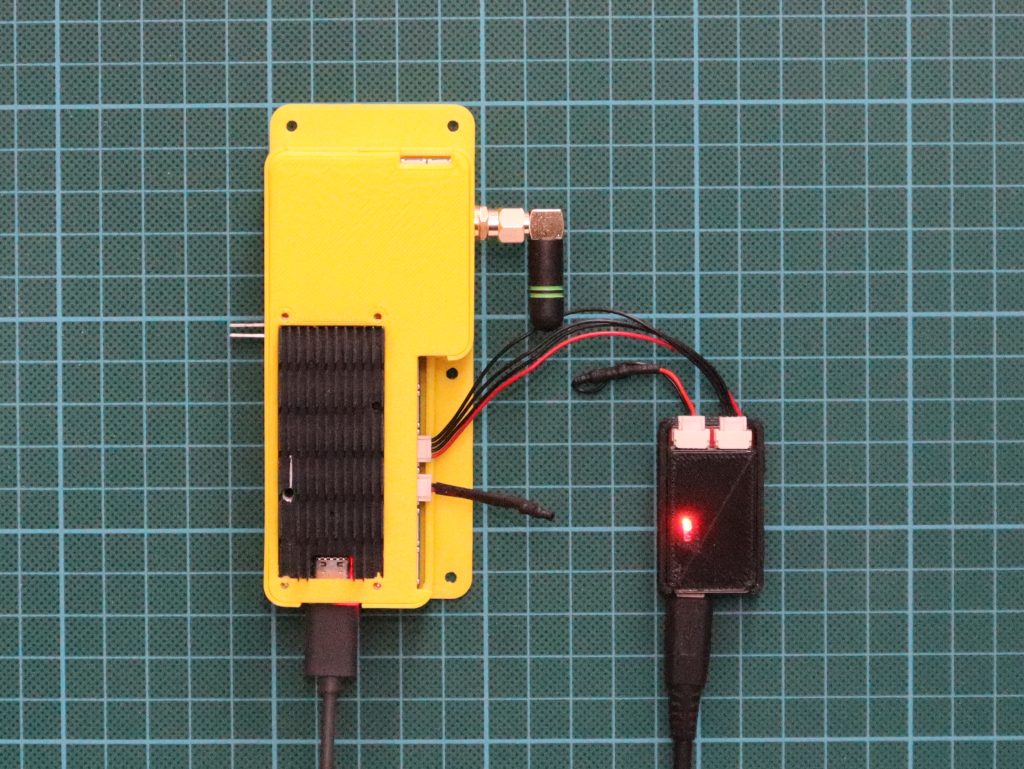
Pika Spark exchanging CAN frames w/ Zubax Babel USB-CAN converter
The standard Linxu CLI tools for both receiving and transmitting CAN frames are candump and cansend. Those (and a couple of other CAN-related tools such as canbusload) are part of the can-utils package. Since this package is not per-default installed on the Arduino Portenta X8s image we need to create a Dockerfile that contains these tools.
FROM debian:stable-slim
RUN apt-get update && \
    apt-get install -y can-utils && \
    apt-get clean && \
    rm -rf /var/lib/apt/lists/*
In the next step a Docker image is built from the Dockerfile using docker build.
docker build --pull --no-cache --tag pika_spark_can_utils_sh .
Now it's time to enable Pika Spark's CAN interface (we use can0) and configure it for a bitrate of 250 kBit/s. Note: the following commands need to be run with super-user privileges (i.e. precede those commands with sudo).
echo 160 > /sys/class/gpio/export
echo out > /sys/class/gpio/gpio160/direction
echo 0 > /sys/class/gpio/gpio160/value

ip link set can0 type can bitrate 250000
ip link set can0 up
As a final step run (docker run) the newly created pika_spark_can_utils container passing the CAN interface via --network host and opening a interactive shell sh.
sudo -u fio sudo docker run -it -u 0 --network host pika_spark_can_utils_sh sh
Receive CAN frames via candump
By invoking candump can0 in the interactive shell of your running Docker container you can display (dump) all incoming CAN packets to stdout. At the same time we are invoking cansendon our PC to transmit some CAN frames using a USB/CAN dongle to the Pika Spark.
# Pika Spark
candump can0

# Your PC
cansend can0 123#DEAD
cansend can0 12345678#CAFE
cansend can0 12345678#DEAFBEEF
...
Transmit CAN frames via cansend
By invoking cansend can0 ID#DATA in the interactive shell of your running Docker container you can trigger the transmission of both standard (11-Bit CAN-ID) and extended (29-Bit CAN-ID) CAN packets. At the same time we are invoking candump on our PC to display (dump) all incoming CAN to stdout.
# Pika Spark
cansend can0 123#DEAD
cansend can0 12345678#CAFE
cansend can0 12345678#DEAFBEEF
...

# Your PC
candump can0
TL;DR:
In order to simplify receiving and transmitting CAN frames via one of Pika Spark's CAN interfaces ready-made bash scripts with integrated error handling and convenience features have been prepared.
git clone https://github.com/pika-spark/pika-spark-containers
cd pika-spark-containers/can-utils-sh
./docker-build.sh
sudo ./docker-run.sh can0 250000
All the best using CAN on your Pika Spark!